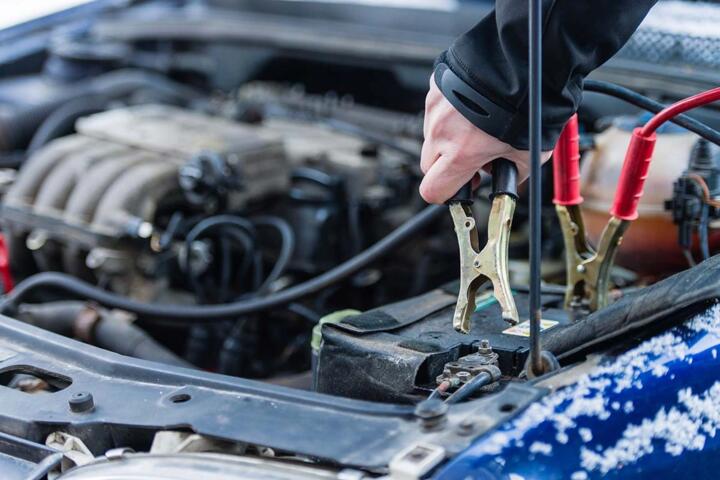
Start a Dead Battery
A jump-start is a temporary power transfer that lets the engine crank and restart. The goal is not to “charge” a dead battery in the moment; the goal is to get enough voltage to start the engine, then let the alternator recharge the battery afterward. If you use jumper cables, you create a high-current path between two batteries, so connection order and cable condition matter. If you use a portable jump starter, you still connect in a specific order, but you avoid relying on a second vehicle’s electrical system.
Practical examples: a sedan that won’t crank after a cold night, a van with a dome light left on, or a motorcycle battery that drops below cranking voltage. In each case, the safest approach starts with visual checks, then correct polarity connections, then a short crank attempt. If the engine doesn’t start after a few tries, you stop and reassess rather than keep forcing it.
Main Problems And Pain Points
People often get the sequence wrong. Reversing polarity can blow fuses, damage electronics, or cause battery venting. Even when polarity is correct, connecting clamps to the wrong points—like a fuel line, a thin bracket, or a painted surface—can create arcing and heat.
Another common mistake is treating a jump-start like a battery charger. A typical alternator can recharge a battery after a successful start, but a jump-start connection alone does not restore a deeply discharged battery to full capacity. If the battery is old, sulfated, or has an internal fault, repeated jump attempts may fail while the underlying issue stays.
Solutions And Advice
Step 1: Check Before You Connect
Park both vehicles on level ground, set parking brakes, and put the donor vehicle in Park or Neutral with the engine off. Turn off headlights, cabin fans, and accessories on both vehicles. Look for cracks, bulging, or wet corrosion around the battery posts; if you see heavy leakage or a strong chemical smell, stop and switch to professional assistance.
Confirm battery polarity: the positive terminal usually has a “+” marking and often a red cover, while the negative terminal usually has a “-” marking. If the battery is in a cramped bay, route cables so they cannot touch belts, fans, or exhaust components. A small aside from the field: many people clip the cable too close to the radiator fan shroud, then forget it moves when the engine starts.
Choose your method. Jumper cables require a donor vehicle and good cable condition; a portable jump starter reduces dependency on another car but still needs correct polarity and a charged unit. If your portable unit has a model label like “12V” and a stated peak current, follow its limits; using it outside temperature specs can trigger protection shutdowns.
Step 2: Use Correct Clamp Order
For jumper cables, connect in this order to reduce the chance of sparks near the battery: first connect one red clamp to the dead battery’s positive (+) terminal. Next connect the other red clamp to the donor battery’s positive (+) terminal. Then connect one black clamp to the donor battery’s negative (-) terminal. Finally, connect the last black clamp to an unpainted metal ground point on the dead vehicle, away from the battery and fuel lines. If the owner’s manual specifies a jump post or ground stud, use that point instead of improvising.
For portable jump starters, connect red to the dead battery’s positive (+) and black to the dead battery’s negative (-) using the clamps provided. Many units include a polarity check; if the unit beeps or refuses to start, disconnect and re-check polarity rather than keep trying. A mild frustration that shows up often: people assume “red to red” always means correct, but some batteries have covers or remote jump posts that can confuse the markings.
Keep the clamps from touching each other and avoid letting cable ends swing. Once connected, do not lean over the battery.
Step 3: Crank Safely And Reassess
Start the donor engine first (for jumper cables) and let it idle for about 2–5 minutes before attempting to crank the dead vehicle. This waiting period helps stabilize voltage so the starter motor sees enough current. Then crank the dead vehicle for short bursts, typically 5–10 seconds, with a pause between attempts to prevent overheating the starter.
If the engine doesn’t start after 2–3 attempts, stop. At that point, the battery may be too degraded, the starter circuit may have a fault, or there may be a parasitic drain. Keep the cables connected only as long as needed; prolonged attempts can overheat cables and increase risk.
After a successful start, let the engine run. For jumper cables, disconnect in reverse order: remove the black ground clamp first, then the black from the donor negative, then the red from donor positive, then the red from the dead battery positive. For portable jump starters, disconnect per the unit’s instructions, usually by removing black first.
Drive or idle long enough for the alternator to recharge. Many batteries need at least 20–30 minutes of driving to recover meaningfully after a typical jump-start, but heavily discharged batteries may require longer. If the battery warning light appears right after the jump, treat it as a sign of a charging system issue rather than repeating the jump.
Case Examples
Example 1: Winter Sedan With Corroded Terminals
A driver reports a 2016 sedan that won’t crank after an overnight freeze. The battery terminals show white corrosion, and the clamps feel loose when first attached. The driver cleans the terminal surfaces enough to get solid metal-to-metal contact, then follows the clamp order: red to dead positive, red to donor positive, black to donor negative, black to an unpainted ground point on the dead car. After a 3-minute donor idle, the sedan cranks on the first attempt. The driver then drives for about 30 minutes and schedules a battery test because the terminals had visible corrosion.
Example 2: Portable Jump Starter On A Van
A driver uses a portable 12V jump starter on a van with a dead battery. The unit’s display shows a low charge indicator, and the driver charges the jump starter before attempting. The driver connects red to the battery positive and black to the negative, then presses the start button. The van cranks but stalls after a few seconds; the driver tries again once after a short pause. The van starts on the second attempt, and the driver notices the battery warning light stays on, so they avoid repeated jump attempts and arrange a charging system check.
Comparison Table
| Method | Main Risk | Best For | When To Stop |
|---|---|---|---|
| Jumper Cables | Incorrect clamp order near battery gas | You have a donor vehicle and good cables | No start after 2–3 attempts or visible battery damage |
| Portable Jump Starter | Wrong polarity or unit temperature limits | You want fewer vehicle-to-vehicle variables | Unit refuses to start or battery area smokes/swells |
| Battery Charger | Overheating or wrong settings | You have time and access to a safe outlet | If the battery is damaged or charger shows fault |
Step-by-step checklist for jump-starting safely:
- Turn off accessories, set brakes, and keep both engines off before connecting.
- Inspect the battery for cracks, bulging, or leaks; stop if you see damage.
- Confirm polarity markings and route cables away from moving parts.
- Connect clamps in the correct order (red positive first, then black ground last for cables).
- Start the donor engine (cables method) and wait 2–5 minutes.
- Crank in short bursts (about 5–10 seconds) and pause between attempts.
- If no start after 2–3 attempts, stop and reassess.
- After a successful start, disconnect in reverse order and drive long enough to recharge.
Common Mistakes
Clamping to painted metal is a frequent failure point. Paint and corrosion increase resistance, which can prevent cranking and create heat at the clamp. Use the designated ground point or clean unpainted metal when the manual permits it.
People also connect the last black clamp to the dead battery negative instead of a ground point. That can increase the chance of sparks near the battery if there is a hydrogen gas presence. The safer pattern keeps the final connection away from the battery area.
Another mistake is leaving the donor engine running at high RPM. Higher RPM can raise alternator output and stress connections, while also increasing the chance of voltage spikes. A steady idle is usually enough.
Some drivers keep trying after repeated failures. If the battery is deeply sulfated or the starter circuit has a fault, repeated cranking can drain the donor and overheat the starter. When the engine refuses to start after a few attempts, switch to diagnosis: battery age, visible damage, and charging system checks.
Finally, people forget that jump-starting does not fix a parasitic drain. If the battery dies again within days, the issue may be a stuck relay, a glovebox light, or an aftermarket alarm. A battery test and a drain test are the next logical steps, not more jumps.
FAQ
How Long Should I Let The Donor Run?
Let the donor idle for about 2–5 minutes before cranking the dead vehicle. This waiting period helps stabilize voltage so the starter sees enough current.
Can I Jump-Start A Battery That Looks Swollen?
Do not jump-start a swollen or leaking battery. Swelling and leakage suggest internal damage, and repeated attempts can increase venting and risk.
What If My Car Has A Jump Post?
Use the jump post or ground stud specified in the owner’s manual. Many vehicles route high-current paths through engineered points to reduce risk to wiring and sensors.
How Many Crank Attempts Are Safe?
Use 2–3 attempts with short bursts (about 5–10 seconds) and pauses between tries. If it still won’t start, stop and reassess rather than keep forcing the starter.
Will A Jump-Start Fully Recharge The Battery?
A jump-start typically provides enough power to start, not a full recharge. After a successful start, drive or idle long enough for the alternator to recharge, and test the battery if it fails again.
Author's Insight
Jump-start safety comes down to controlling current paths and avoiding sparks near battery gas. The correct clamp order reduces the chance of arcing at the battery, and short crank attempts limit starter overheating. Owner’s manuals often specify jump posts and ground points because modern electronics can be sensitive to voltage transients.
Portable jump starters add convenience, but they still require correct polarity and respect for temperature limits listed by the manufacturer. If a battery fails again soon after a jump, battery testing and charging system checks usually reveal the real cause more reliably than repeated jump attempts.
Key Takeaways
- Jump-starting is for restarting, not for fully recharging a dead battery.
- Inspect the battery for damage before connecting, and route cables away from moving parts.
- Use the correct clamp order and the vehicle’s specified jump points when available.
- Crank in short bursts and stop after 2–3 failed attempts to avoid overheating and wasted cycles.
- If the battery dies again quickly or warning lights appear, plan for battery and charging system testing.